
Sage is one of the most versatile and aromatic herbs in any home garden. Not only does it add flavor to dishes, but it also has medicinal properties and can enhance the beauty of your garden or indoor space. While sage is generally hardy, repotting is essential for maintaining healthy growth, vibrant leaves, and optimal herb production.
Repotting ensures that your sage plant has enough space for its roots, access to fresh nutrients, and proper drainage, all of which contribute to a stronger, more productive herb. In this guide, we’ll cover why repotting is necessary, how to choose the right pot and soil, and the step-by-step process for repotting sage successfully.
1. Why Repot Sage?
Repotting is an essential aspect of sage care for several reasons:
- Root growth: Over time, sage roots can become crowded in a pot, restricting nutrient absorption.
- Nutrient refreshment: Fresh soil replenishes nutrients depleted over time.
- Improved drainage: Ensures that roots are not waterlogged, preventing root rot.
- Plant rejuvenation: Encourages new growth, producing more leaves and stronger stems.
Typically, sage should be repotted every 1–2 years, depending on the size of the pot and the plant’s growth rate.
2. Signs Your Sage Needs Repotting
Before repotting, it’s important to identify if your sage plant actually needs it. Common signs include:
- Roots growing out of drainage holes.
- Water sitting on the soil surface instead of soaking in.
- Slow growth or fewer leaves despite regular care.
- Yellowing leaves or weak stems.
- Soil compacted or depleted, making the plant unstable.
If you notice any of these signs, it’s time to repot your sage plant to ensure it remains healthy.
3. Choosing the Right Pot for Sage
The right pot is crucial for sage growth. Here’s what to consider:
- Size: Choose a pot 1–2 inches larger in diameter than the current one. Avoid overly large pots, which may retain excess moisture.
- Material: Clay or terracotta pots are ideal for indoor sage because they allow breathability and prevent waterlogging. Plastic pots work well for outdoor use.
- Drainage: Ensure multiple drainage holes to prevent root rot.
💡 Tip: A slightly larger pot with proper drainage helps the plant establish quickly without the risk of overwatering.
4. Preparing the Soil Mix

Sage prefers well-draining, nutrient-rich soil. A good soil mix supports strong root growth and aromatic leaves.
Recommended soil mix:
- 50% potting soil
- 25% sand or perlite for aeration and drainage
- 25% compost or organic matter for nutrients
Avoid heavy, clayey soil, as it retains too much water and can harm sage roots.
5. Tools Needed for Repotting
Having the right tools makes repotting easier and reduces stress for your plant. You’ll need:
- A new pot with drainage holes
- Fresh potting soil
- Gardening gloves
- Small hand trowel or spoon
- Watering can
- Scissors or pruning shears (optional)
These tools help ensure a clean and safe repotting process.
6. Step-by-Step Guide to Repot Sage
Follow these steps for successful repotting:
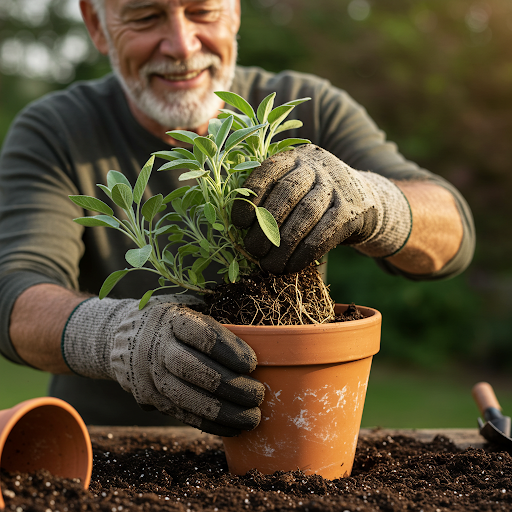
Step 1: Remove Sage from Old Pot
- Gently hold the base of the plant and tip the pot slightly.
- Tap the sides and bottom to loosen the root ball.
- Carefully lift the plant, keeping roots intact.
Step 2: Inspect and Trim Roots
- Check for dead, rotten, or excessively long roots.
- Trim damaged roots using clean scissors or pruning shears.
- Loosen compacted roots gently to encourage new growth.
Step 3: Prepare the New Pot
- Add a layer of fresh soil at the bottom of the new pot.
- Ensure enough depth for the root ball.
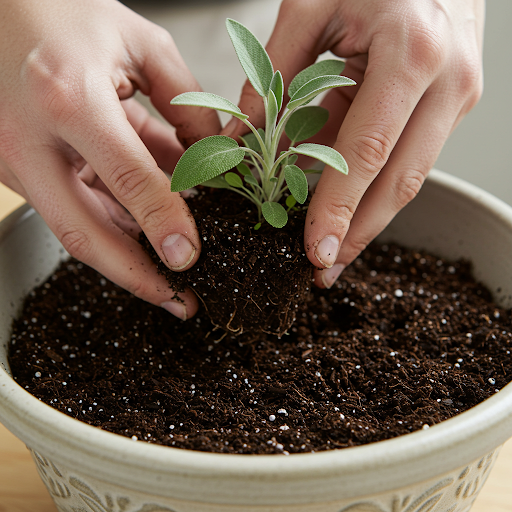
Step 4: Place the Sage Plant
- Position the plant in the center of the new pot.
- Add soil around the root ball, pressing gently to remove air pockets.
Step 5: Water Thoroughly
- Water the sage immediately after repotting to help the soil settle.
- Ensure water drains freely from the bottom of the pot.
Step 6: Mulch (Optional)
- Add a thin layer of mulch to retain moisture and reduce soil temperature.
- Avoid covering the base of the plant directly.
7. Post-Repotting Care
After repotting, sage needs extra care to establish quickly:
- Sunlight: Place in bright, indirect sunlight for the first week. Gradually introduce to full sun.
- Watering: Keep soil moist but not soggy. Overwatering can harm newly repotted sage.
- Fertilization: Wait 2–3 weeks before applying fertilizer to prevent root burn.
- Pruning: Remove any damaged or yellow leaves to encourage new growth.
Proper post-repotting care ensures faster recovery and stronger growth.
8. Common Mistakes to Avoid
Repotting sage is simple if you avoid these common errors:
- Using overly large pots, which can lead to waterlogged roots.
- Planting too deep or too shallow, stressing the plant.
- Not checking for root rot or disease during repotting.
- Overwatering after repotting, causing root suffocation.
- Exposing the plant to harsh sunlight immediately, which can shock it.
Avoiding these mistakes keeps your sage healthy and productive.
9. Fertilizing Sage After Repotting
Sage benefits from light fertilization after repotting:
- Use organic compost or a balanced liquid fertilizer once the plant has settled.
- Apply every 4–6 weeks during the growing season.
- Avoid excessive nitrogen, which encourages leafy growth over aromatic oils.
Fertilizing properly ensures robust leaves and flavorful herbs.
10. Pruning Sage for Health and Flavor
Pruning is not only aesthetic but also promotes bushy growth and stronger flavor:
- Trim back 1/3 of the plant during the growing season.
- Remove any woody or weak stems to encourage new shoots.
- Regular pruning improves air circulation, reducing fungal infections.
Well-pruned sage produces more aromatic leaves and a healthier plant overall.
11. Watering Tips for Sage
Sage prefers slightly dry soil between watering:
- Water deeply but infrequently to promote strong roots.
- Avoid letting the soil stay soggy, especially in pots.
- Reduce watering in winter when growth slows.
Consistent and appropriate watering helps maintain leaf flavor and plant longevity.
12. Ideal Sunlight Conditions
Sage thrives in bright sunlight:
- Indoors: Place near a south-facing window or under grow lights.
- Outdoors: Ensure at least 6–8 hours of sunlight daily.
- Temperature: Prefers 18–24°C (65–75°F) but can tolerate light frost.
Proper sunlight encourages healthy foliage and aromatic oils.
13. Repotting Frequency
For optimal growth, repot sage every 1–2 years:
- Monitor root growth; crowded roots indicate the need for repotting.
- Repotting rejuvenates the plant and prevents nutrient depletion.
- Container-grown sage may need more frequent repotting than garden-grown sage.
Regular repotting ensures continuous growth and abundant harvests.
14. Harvesting Sage Leaves
After repotting and establishment, you can start harvesting:
- Pick leaves once the plant has multiple stems and healthy foliage.
- Harvest in the morning for maximum flavor.
- Use scissors to cut stems, leaving some leaves for continued growth.
- Dry or freeze extra leaves for long-term use.
Frequent harvesting encourages new growth and stronger flavor.
15. Final Thoughts: Healthy Sage Through Proper Repotting
Repotting sage is essential for vibrant growth, rich aroma, and flavorful leaves. By choosing the right pot, preparing fresh soil, and following careful repotting steps, your sage will thrive and continue to enhance your kitchen, garden, or balcony.
With consistent care — including watering, pruning, fertilization, and sunlight — container-grown sage can produce fresh leaves for years, adding both beauty and utility to your home. Repotting is a simple yet powerful way to ensure your sage remains healthy, aromatic, and productive.
Repotting sage is a small investment of time that pays off in abundant, flavorful leaves and a long-lived plant. By following these steps, beginners and experienced gardeners alike can enjoy the satisfaction of growing and harvesting their own sage at home.