Water spinach, also known as kangkung, morning glory, or Ipomoea aquatica, is one of the easiest and fastest-growing leafy vegetables you can cultivate at home. Known for its crisp stems and tender leaves, this tropical green is a staple in many Asian cuisines—delicious stir-fried, sautéed, or added to soups.
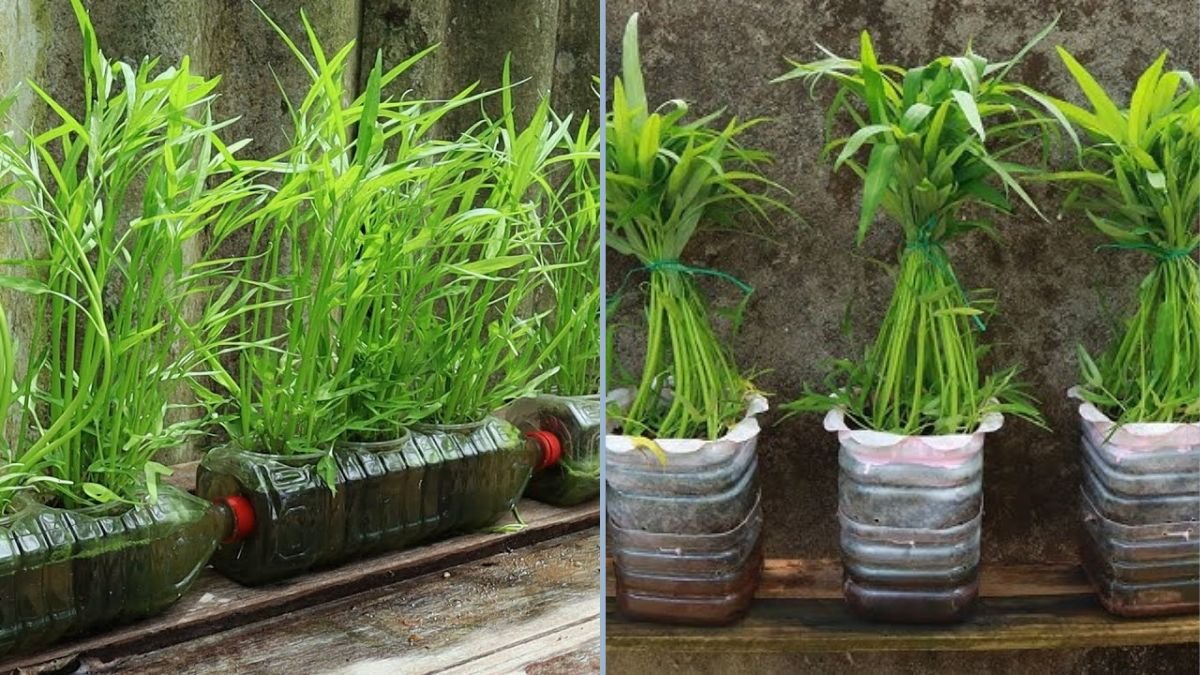
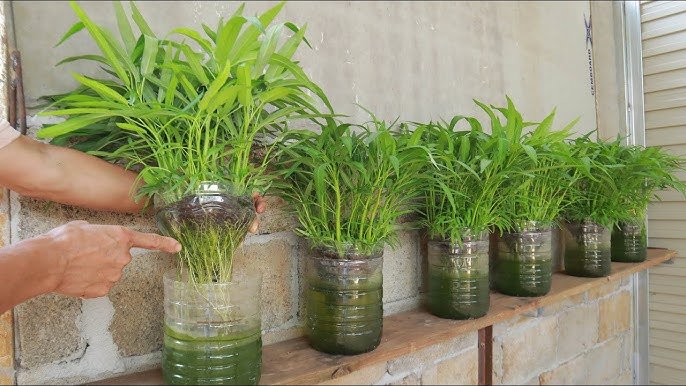
But did you know you can grow water spinach in plastic bottles right at home—without needing a garden or large space? This method is perfect for apartment dwellers, beginners, and eco-conscious gardeners looking to reuse waste materials.
In this guide, we’ll explore how to grow water spinach in plastic bottles, step by step, along with essential tips to ensure lush, healthy growth and continuous harvests.
Why Grow Water Spinach in Plastic Bottles?
Using plastic bottles for gardening is not only practical but also sustainable. Here’s why this method works so well:
- Space-Saving: Perfect for balconies, patios, or small windowsills.
- Low-Cost Setup: Uses recycled bottles instead of pots or grow beds.
- Eco-Friendly: Reduces plastic waste while growing your own food.
- Easy Maintenance: Requires minimal effort and grows quickly.
- Perfect for Beginners: Water spinach is resilient and grows fast in nearly any condition.
With the right setup, you can have a mini hydroponic-style garden at home using nothing more than large bottles and some seeds.
Materials You’ll Need
Before getting started, gather the following items:
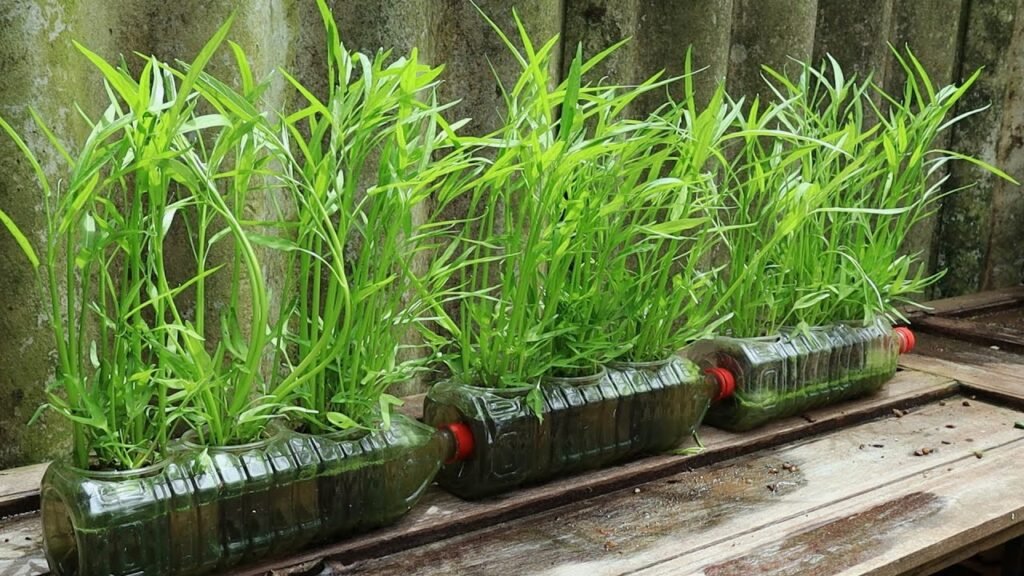
- Large plastic bottles (1.5 to 2 liters or more)
- Sharp scissors or a knife
- Water spinach (kangkung) seeds or cuttings
- Potting soil or a soil-compost mix
- Small pebbles or gravel (for drainage)
- Water
- Fertilizer (organic compost or liquid fertilizer)
Optional: A tray or container to catch excess water if you’re growing indoors.
Step-by-Step Guide to Growing Water Spinach in Plastic Bottles
Step 1: Prepare the Plastic Bottle
Start by cleaning the bottle thoroughly to remove any residue. Then, use scissors or a knife to cut the bottle horizontally about one-third from the top.
You’ll use the bottom portion as your growing container. If you like, you can invert the top part and place it back into the bottom as a cover or funnel for watering—this also helps reduce evaporation.
Next, make a few drainage holes at the bottom to allow excess water to escape.
Step 2: Create the Soil Mix
Water spinach loves nutrient-rich, well-draining soil. Mix equal parts of:
- Garden soil
- Compost or organic fertilizer
- Sand or perlite (to improve drainage)
Fill the bottle about ¾ full with the soil mix. Leave some space at the top so water doesn’t overflow when watering.
Step 3: Planting Seeds or Cuttings

You can grow water spinach from seeds or stem cuttings:
- From seeds:
Soak the seeds in water for 6–8 hours before planting. This softens the seed coat and speeds up germination. Sow the seeds about 1 cm deep into the soil and cover lightly. - From cuttings:
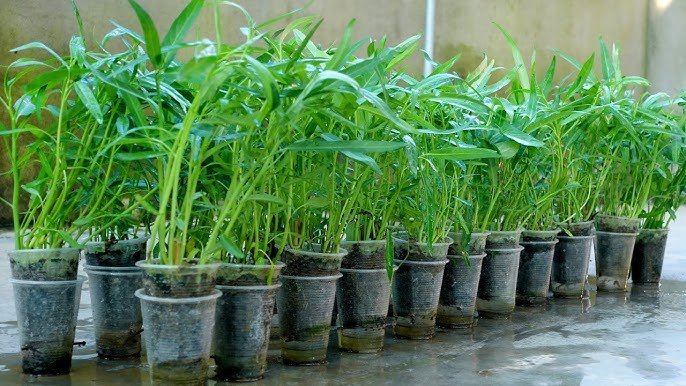
Take healthy cuttings (about 6–8 inches long) from mature water spinach stems. Remove the bottom leaves and stick the stems about 2 inches deep into the soil.
Water spinach roots quickly—within a few days, you’ll notice new growth emerging.
Step 4: Watering
Water spinach thrives in moist soil. Water the soil thoroughly right after planting, and then keep it consistently damp.
You can water once daily or every other day depending on your climate. If you live in a hot, dry area, mist the leaves occasionally to maintain humidity.
Tip: Place a tray beneath the bottles to catch excess water and prevent mess if growing indoors.
Step 5: Provide Sunlight
Water spinach loves warmth and light. Place your bottles in a sunny area that receives at least 4–6 hours of sunlight daily.
If you’re growing indoors, choose a bright windowsill or use an LED grow light. Lack of sunlight can cause the plants to grow tall and weak, with fewer leaves.
Step 6: Fertilizing for Growth
To encourage lush, green growth, feed your plants with organic fertilizer or compost tea every 2–3 weeks.
You can also use diluted liquid fertilizer—just mix it with water and pour it into the soil. Avoid over-fertilizing, as too much nitrogen can make the stems soft and watery.
Step 7: Regular Maintenance and Care
Water spinach grows very fast, especially in warm conditions. To keep it healthy and productive:
- Trim regularly: Prune the tips every few weeks to encourage branching and bushier growth.
- Remove yellow leaves: This helps prevent disease and keeps the plant strong.
- Control pests: Watch out for aphids and caterpillars. If needed, spray a natural pest solution like neem oil or soapy water.
- Rotate sunlight exposure: Turn the bottles every few days for even growth.
With proper care, your plants will grow vigorously and provide a steady supply of fresh greens.
Harvesting Your Water Spinach
Water spinach grows quickly—you can begin harvesting in about 4–5 weeks after planting!
There are two common harvesting methods:
- Cut-and-Come-Again:
Harvest the tender top shoots and leaves, leaving the lower stems intact. The plant will continue growing new shoots for multiple harvests. - Full Harvest:
If you prefer a full harvest, cut the entire plant about 2 inches above the soil. It will regrow within 1–2 weeks under the right conditions.
Tip: Harvest in the morning for crisp, fresh leaves. Avoid harvesting during midday heat, which can cause wilting.
Extra Tips for Success
To ensure strong and productive water spinach growth in plastic bottles, follow these tips:
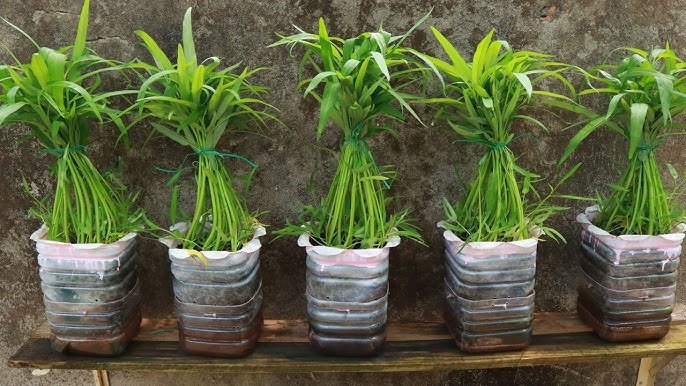
- Use large bottles: The bigger the container, the better the root growth and water retention.
- Keep soil moist: Water spinach loves moisture—dry soil slows growth and causes tough stems.
- Avoid overcrowding: If growing multiple plants in one bottle, thin out weak seedlings to prevent competition.
- Regular pruning: Frequent trimming encourages fresh shoots and prevents leggy growth.
- Add nutrients: Use organic fertilizer or compost tea to replenish nutrients after each harvest.
- Monitor sunlight: Ensure at least 4 hours of sunlight daily for fast, healthy growth.
Following these steps will guarantee lush, tender, and tasty water spinach right at home!
Benefits of Growing Water Spinach in Plastic Bottles
- Eco-Friendly Gardening: Reusing bottles reduces plastic waste and encourages sustainable living.
- Space-Efficient: Perfect for balconies, patios, or even kitchen windows.
- Low-Cost and Accessible: No need for expensive pots or gardening tools.
- Continuous Harvest: Regular trimming ensures a steady supply of fresh greens.
- Fun and Educational: Great for kids or beginners to learn about growing vegetables.
Plus, the green vines of water spinach add a refreshing touch of nature to any living space!
Health Benefits of Water Spinach
Water spinach isn’t just easy to grow—it’s also incredibly nutritious! It’s packed with:
- Iron and Calcium: Essential for strong bones and energy.
- Vitamins A & C: Boost immunity and skin health.
- Fiber: Supports digestion and gut health.
- Antioxidants: Help fight inflammation and boost overall wellness.
By growing your own water spinach, you’re not only saving money but also enjoying a fresh, pesticide-free, and nutrient-rich food source.
Conclusion
Growing water spinach in plastic bottles is one of the easiest and most rewarding gardening projects you can try at home. It’s sustainable, affordable, and perfect even for those with limited space. With just a few bottles, some soil, and regular care, you can harvest fresh, crisp greens all year round.
This method not only helps reduce waste but also turns your home into a mini-green haven. Whether you want to enjoy delicious stir-fried kangkung or simply love the satisfaction of growing your own food, plastic bottle gardening is the way to go.
So, don’t throw away those bottles—turn them into beautiful, productive mini gardens. With a little patience and consistent care, you’ll soon be enjoying your own home-grown water spinach, fresh from the bottle to your plate!