Okra, also known as lady’s finger or gumbo, is a nutrient-rich vegetable enjoyed worldwide for its versatility in cooking. High in fiber, vitamins A and C, folate, and antioxidants, okra is an excellent addition to soups, stews, stir-fries, and even pickles. Traditionally grown in gardens, okra requires warm temperatures, plenty of sunlight, and well-drained soil to thrive.
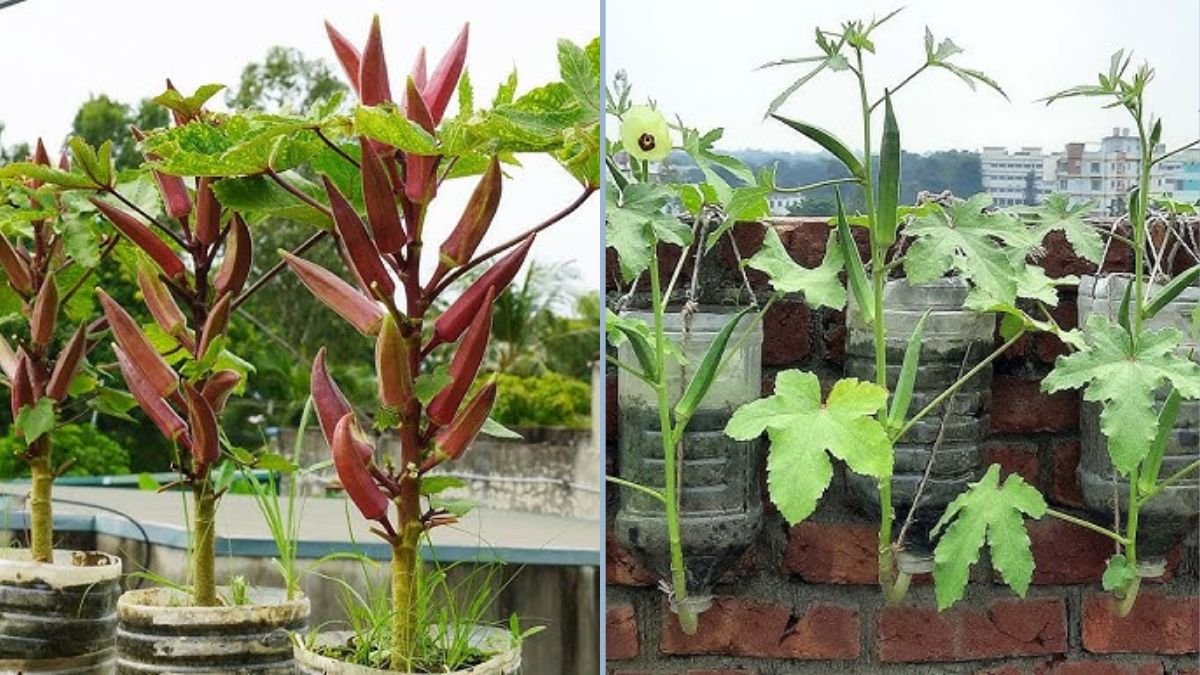
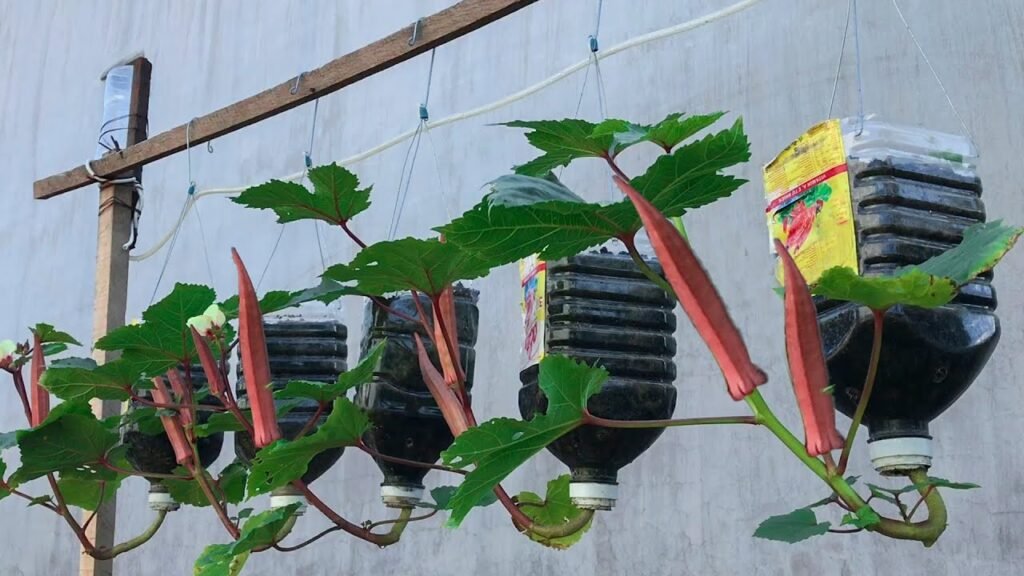
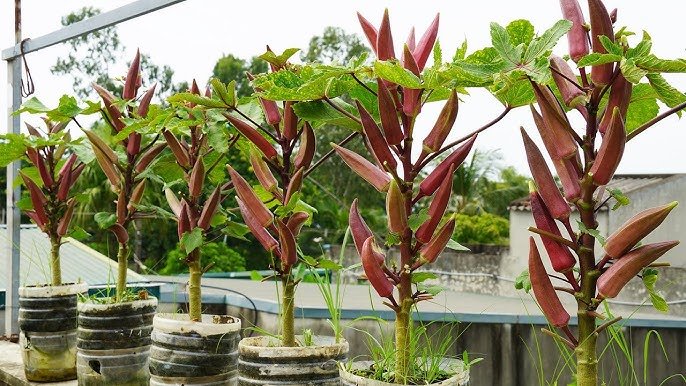
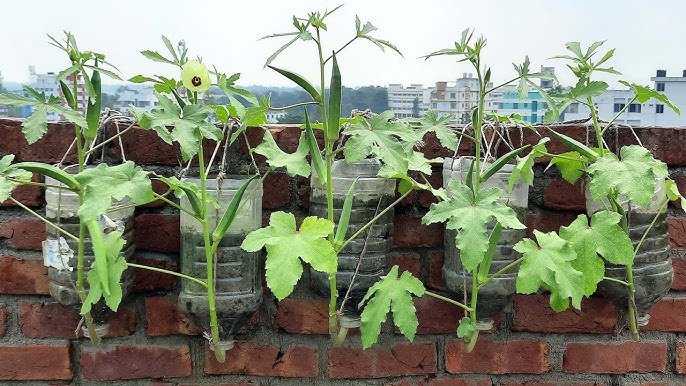
However, if you live in an urban setting or have limited space, growing okra might seem challenging. The solution? Hanging plastic bottle gardens. Using recycled bottles to cultivate okra plants is a simple, eco-friendly, and space-saving method that allows you to grow healthy plants even in small areas like balconies, patios, or rooftops. This blog will provide a comprehensive guide on growing okra in hanging bottles, from preparation to harvest.
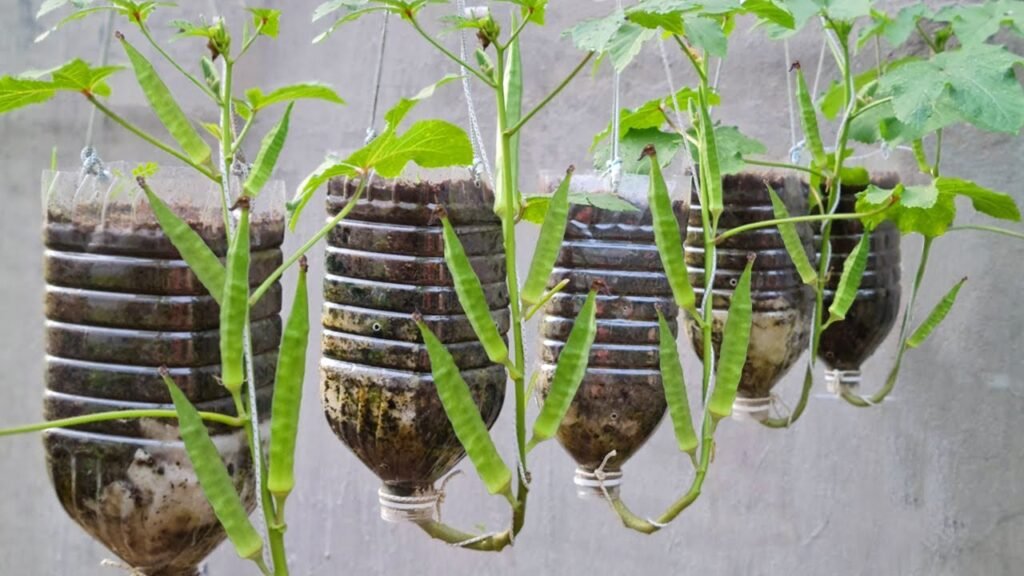
Why Grow Okra in Hanging Plastic Bottles?
- Space-Saving: Perfect for apartments, balconies, and small outdoor areas.
- Eco-Friendly: Reuses plastic bottles and reduces waste.
- Easy Maintenance: Hanging bottles make watering and harvesting convenient.
- Better Drainage: Elevated containers reduce the risk of waterlogging and root rot.
- Pest Control: Hanging plants are less accessible to some common garden pests.
Materials You’ll Need
- Plastic bottles (1–2 liters recommended)
- Utility knife or scissors
- Potting soil or a mix of compost and garden soil
- Okra seeds or seedlings
- Cotton string, rope, or hooks for hanging
- Small pebbles for drainage (optional)
- Water
- Fertilizer (organic or balanced liquid fertilizer)
Step-by-Step Guide to Growing Okra in Hanging Plastic Bottles
Step 1: Preparing the Plastic Bottles
- Wash the bottles thoroughly to remove any residue.
- Cut a rectangular opening on the side of each bottle for planting seeds or seedlings.
- Drill small drainage holes at the bottom to prevent waterlogging.
- Attach a string, rope, or hook securely to hang the bottle. You can loop it around the neck of the bottle or make holes at the top for threading.
Step 2: Adding Soil and Drainage
- Optional: Place a thin layer of small pebbles at the bottom of the bottle to improve drainage.
- Fill the bottle with nutrient-rich soil or a mix of garden soil and compost. Okra prefers fertile, well-draining soil with a pH between 6.0–6.8.
- Leave about an inch from the top for planting and watering.
Step 3: Planting Okra Seeds or Seedlings
- From Seeds: Plant 2–3 seeds per bottle, about 1 inch deep, and space them evenly.
- From Seedlings: Dig a small hole in the soil, place the seedling, and cover lightly with soil.
- Water gently to settle the soil and activate germination.
Step 4: Hanging the Bottles
- Hang the bottles in a location that receives at least 6 hours of sunlight per day.
- Ensure that the bottles are secure and won’t tip over in the wind.
- Arrange bottles so that plants have enough space to grow without shading each other.
Caring for Hanging Okra Plants

- Watering: Keep the soil consistently moist but not waterlogged. Hanging bottles dry out faster, so check water levels frequently.
- Fertilizing: Apply a balanced liquid fertilizer every 2–3 weeks to encourage healthy growth and flower production.
- Sunlight: Okra thrives in full sun. If indoors, consider using grow lights to supplement sunlight.
- Pruning: Remove dead or yellowing leaves to improve airflow and prevent disease.
- Pest Management: Watch for aphids, spider mites, or caterpillars. Neem oil or insecticidal soap works well for organic control.
Tips for Maximizing Okra Growth in Hanging Bottles
- Use Tall Bottles: Okra has long roots, so deeper bottles provide enough space for root development.
- Thin Seedlings: Once seedlings sprout, thin to one plant per bottle to avoid overcrowding.
- Regular Harvesting: Pick mature pods every few days to encourage continuous flowering and fruiting.
- Support Growth: As plants grow taller, hang bottles at a height where pods can be easily harvested.
- Temperature: Okra grows best in warm weather (75–95°F). Protect young plants from frost or extreme cold.
Harvesting Okra
- Okra pods are ready to harvest 50–60 days after planting.
- Pick pods when they are 3–5 inches long for optimal tenderness.
- Use a sharp knife or scissors to avoid damaging the plant.
- Regular harvesting encourages more flowering and a higher yield.
- You can also harvest leaves for cooking if desired, as they are edible and nutritious.
Benefits of Growing Okra in Hanging Plastic Bottles
- Fresh and Nutritious: Enjoy homegrown okra with superior taste and nutrient content.
- Eco-Friendly Gardening: Recycles plastic bottles and reduces environmental waste.
- Convenience: Hanging bottles make watering, fertilizing, and harvesting easier.
- Space Efficiency: Perfect for urban environments or areas with limited soil space.
- Continuous Yield: Regular harvesting keeps plants producing throughout the growing season.
Common Mistakes to Avoid
- Overcrowding Seeds: Planting multiple seeds per bottle without thinning can stunt growth.
- Ignoring Water Needs: Hanging bottles dry out faster, so regular watering is essential.
- Insufficient Sunlight: Okra needs full sun to flower and produce pods.
- Poor Drainage: Ensure drainage holes are not blocked to prevent root rot.
- Neglecting Pests: Inspect plants regularly for insects and take action promptly.
Tips for Year-Round Hanging Okra Gardening
- Indoor Growing: Use grow lights and maintain warm temperatures to grow okra indoors during colder months.
- Succession Planting: Sow seeds every 2–3 weeks to maintain a continuous supply of pods.
- Experiment with Varieties: Try different okra varieties for taste, color, and pod size.
- Vertical Gardening: Combine hanging okra bottles with other vegetables like tomatoes, peppers, or herbs to maximize space.
Expanding Your Hanging Bottle Garden
Once you’ve mastered hanging okra bottles, you can grow other vegetables and herbs using the same method:
- Green onions and scallions
- Lettuce and spinach
- Tomatoes and peppers (smaller varieties)
- Herbs such as basil, cilantro, or parsley
This method allows you to create a productive, eco-friendly vertical garden even in urban spaces with limited soil area.
Conclusion
Growing okra in hanging plastic bottles is an easy, cost-effective, and sustainable way to enjoy fresh vegetables at home. This method is ideal for urban gardeners, beginners, or anyone looking to save space while producing nutritious, delicious okra.
By following these steps—from preparing the bottles and planting seeds to hanging, caring, and harvesting—you can enjoy a continuous supply of fresh okra throughout the growing season. This innovative approach not only recycles plastic but also maximizes productivity in small spaces, making it a perfect solution for modern urban gardening.
Start your hanging bottle okra garden today and experience the satisfaction of growing your own fresh, homegrown produce with minimal effort and space.