Eggplants (Solanum melongena), also known as brinjals, are a staple in kitchens worldwide, prized for their versatility, taste, and nutritional value. But growing healthy, fruitful eggplants at home can seem challenging, especially for urban gardeners with limited space.
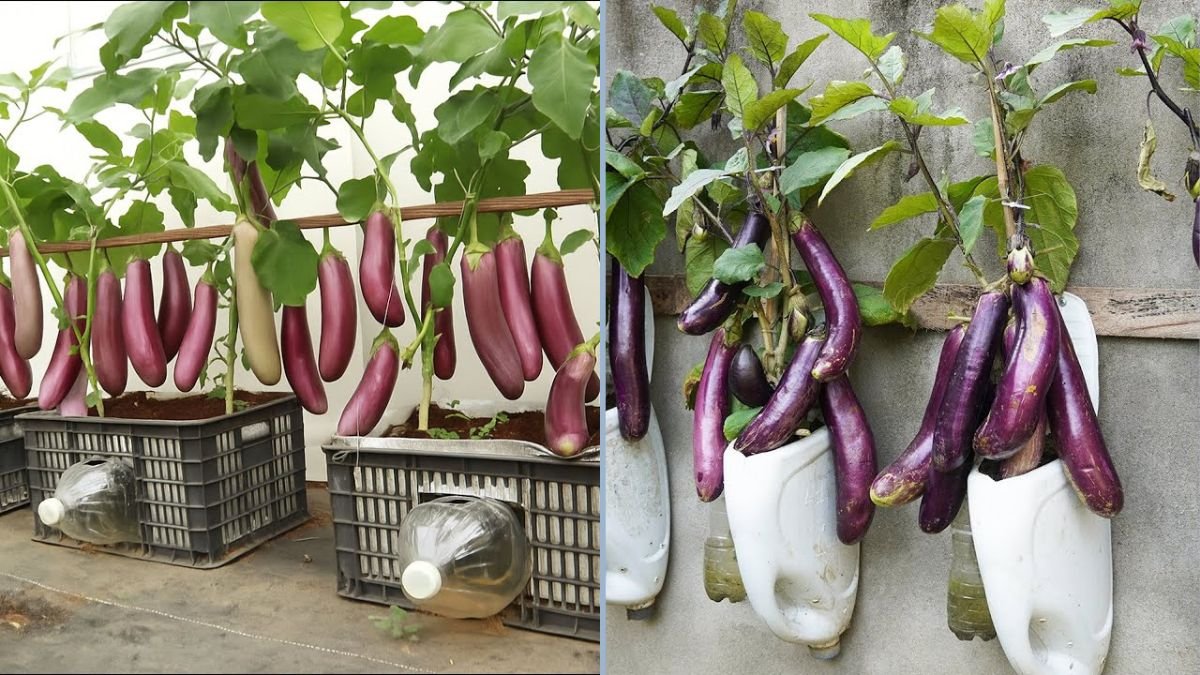
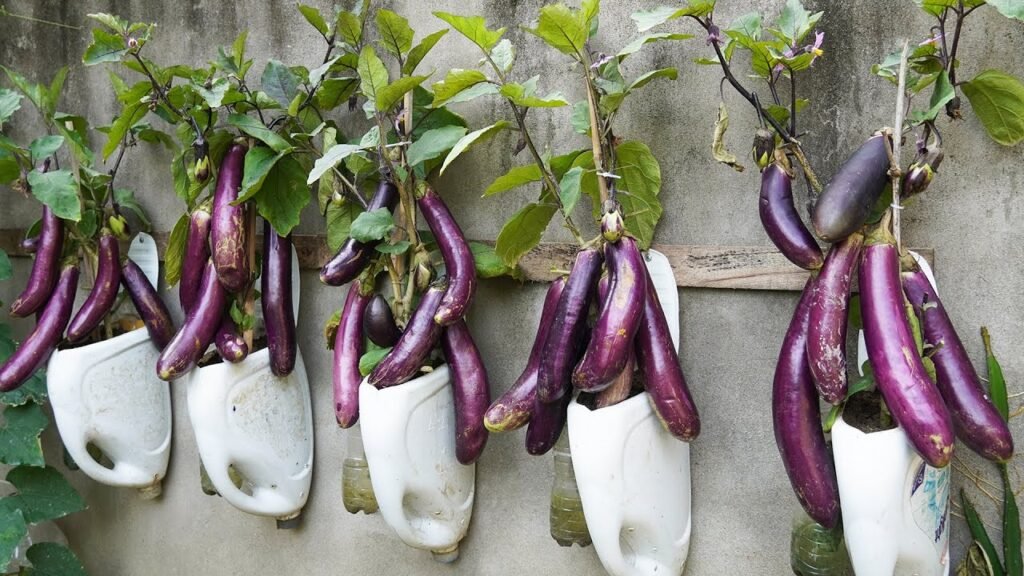
Here’s the exciting part: old plastic bottles can be repurposed into an innovative, space-saving solution for growing eggplants at home, yielding healthy plants and abundant fruits. This DIY gardening method is not only eco-friendly but also surprisingly effective. In this guide, we’ll explore how to transform discarded plastic bottles into thriving eggplant planters, along with tips for fertilization, care, and maximizing harvest.
Why Grow Eggplants at Home?
- Freshness: Homegrown eggplants are tastier and more nutritious than store-bought ones.
- Cost-Effective: Save money by growing your own vegetables instead of buying them.
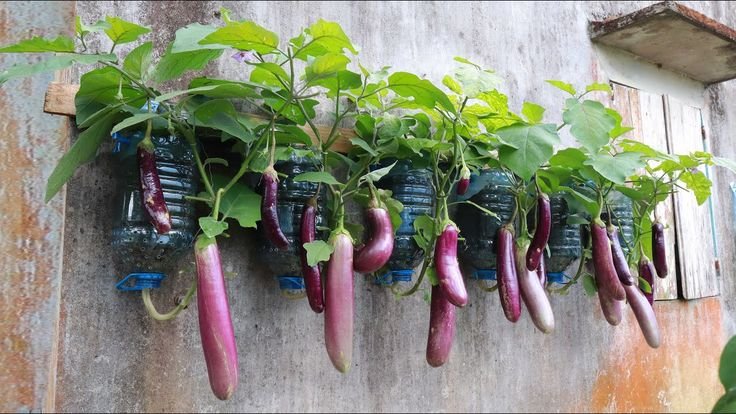
- Space-Saving: Ideal for balconies, rooftops, and small yards using vertical or container gardening.
- Pesticide Control: You decide which fertilizers and pesticides to use, enabling organic growth.
- Eco-Friendly: Recycling plastic bottles reduces waste while producing food.
Step 1: Choosing the Right Eggplant Variety

Selecting the right variety for container gardening ensures better yield and manageable plant size. Consider:
- Compact Varieties: Baby eggplants, Black Beauty, or Patio Eggplant are ideal for small containers.
- Climate Suitability: Eggplants thrive in warm weather (21–30°C) with plenty of sunlight.
- Harvest Time: Choose varieties with shorter maturity periods if you want quick results.
Pro Tip: Compact or dwarf varieties produce more fruits in limited spaces compared to traditional large varieties.
Step 2: Preparing Plastic Bottles for Planting
Old plastic bottles are the foundation of this unique home gardening method:
- Select Bottles: Large 2-liter or 1.5-liter bottles work best. Clean them thoroughly.
- Cut Openings:
- Cut the top portion to create a wide opening for planting.
- Alternatively, cut a side slit to allow easy planting and watering.
- Drainage Holes:
- Poke small holes at the bottom for water drainage to prevent root rot.
- Optional Hanging Setup:
- Make holes near the top and use strong twine to hang bottles vertically for a space-saving vertical garden.
Pro Tip: Transparent bottles can encourage algae growth, so cover the sides with black tape or paint if needed.
Step 3: Preparing the Growing Medium
Eggplants require nutrient-rich, well-draining soil. Here’s a recommended mix:
- 2 parts garden soil or loamy soil
- 1 part compost or well-rotted manure
- 1 part perlite, vermiculite, or sand for drainage
Tips:
- Avoid using plain garden soil; it may contain pests or poor nutrient content.
- Mix in slow-release organic fertilizers for long-term nourishment.
Step 4: Planting Eggplant Seedlings
- Select Healthy Seedlings:
- Choose seedlings with 3–4 true leaves and strong stems.
- Avoid yellow or weak plants.
- Planting Technique:
- Fill the prepared bottle with soil mix up to 2 inches below the opening.
- Make a hole deep enough to cover the root ball and plant the seedling firmly.
- Water gently after planting.
- Spacing:
- If using multiple bottles, place them at least 30–40 cm apart to allow air circulation and sunlight.
Pro Tip: Plant multiple bottles in a vertical arrangement to maximize limited balcony or rooftop space.
Step 5: Providing Adequate Sunlight
Eggplants need full sun for at least 6–8 hours a day to produce healthy fruits:
- Place bottles on sunny windowsills, balconies, or terraces.
- Rotate containers periodically to ensure all sides receive sunlight.
- For indoor setups with limited light, consider using LED grow lights to supplement.
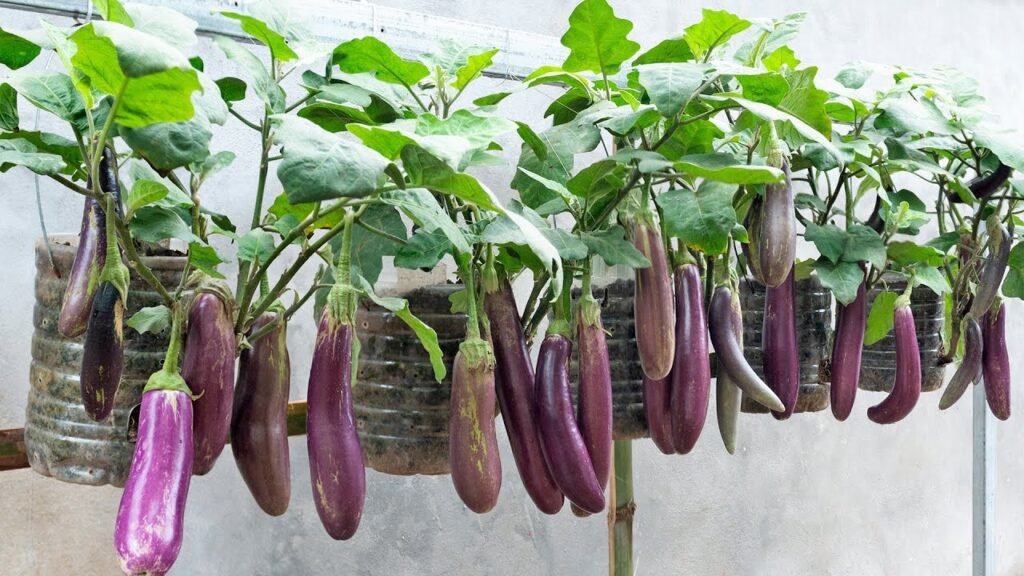
Pro Tip: Adequate sunlight ensures strong stems, vibrant leaves, and larger fruits.
Step 6: Watering and Fertilization
Water and nutrients are crucial for eggplant growth in containers:
- Watering:
- Keep the soil consistently moist but not waterlogged.
- Water early in the morning or late afternoon to reduce evaporation.
- Fertilization:
- Apply balanced organic fertilizers every 2–3 weeks.
- Eggplants respond well to nitrogen during vegetative growth and potassium and phosphorus during flowering and fruiting.
- Banana Peel Trick:
- Adding chopped banana peels near the base provides potassium, enhancing flowering and fruit development.
Pro Tip: Avoid overwatering; soggy soil can lead to root rot and yellow leaves.
Step 7: Supporting the Plant
Eggplants can become heavy as fruits develop, so providing support is key:
- Use bamboo sticks, small trellises, or skewers tied gently to the stem.
- For vertical bottle gardens, ensure the hanging structure is sturdy enough to hold the weight of the soil and plant.
Pro Tip: Regular pruning of excess leaves and weak branches encourages stronger, fruitful stems.
Step 8: Pruning and Care for Bushy Growth
- Tip Pruning:
- Pinch off the growing tip once the plant reaches desired height.
- Encourages lateral branches, resulting in bushier plants.
- Leaf Pruning:
- Remove yellow or damaged leaves to prevent disease and improve sunlight penetration.
- Regular Inspection:
- Check for pests like aphids, whiteflies, or spider mites.
- Use organic sprays like neem oil or insecticidal soap if needed.
Pro Tip: Bushy plants tend to produce more flowers and fruits, maximizing yield per bottle.
Step 9: Pollination Tips
Eggplants require pollination to set fruits:
- Outdoors, bees and other insects do the job naturally.
- Indoors or in small spaces, hand pollination can help:
- Gently shake flowers or use a soft brush to transfer pollen from male to female flowers.
Pro Tip: Consistent pollination increases fruit set and overall yield.
Step 10: Harvesting Eggplants
Eggplants are ready for harvest when:
- The fruit is glossy, firm, and reaches the desired size.
- The skin has a rich, deep color (depending on variety).
- Seeds inside are not hard or overripe.
Harvesting Technique:
- Use a sharp knife or scissors to cut fruits from the plant, leaving a small stem attached.
- Avoid pulling fruits to prevent damage to the plant.
Pro Tip: Regular harvesting encourages the plant to produce more fruits.
Step 11: Benefits of Using Plastic Bottles for Eggplants
- Recycling & Sustainability: Reduces plastic waste by repurposing bottles.
- Space Efficiency: Vertical or horizontal arrangements fit in small spaces.
- Mobility: Bottles can be moved to optimize sunlight or protect plants from extreme weather.
- Cost-Effective: No need to buy expensive pots or planters.
- Controlled Growth: Easier to monitor water, soil, and pest management in individual containers.
Step 12: Common Challenges and Solutions
- Yellow Leaves:
- Cause: Overwatering, nutrient deficiency.
- Solution: Adjust watering, add balanced fertilizer.
- Pests:
- Aphids and whiteflies are common.
- Solution: Use neem oil spray or insecticidal soap.
- Small Fruits:
- Cause: Poor pollination or nutrient deficiency.
- Solution: Hand-pollinate flowers, ensure proper fertilization.
- Root Rot:
- Cause: Waterlogged soil.
- Solution: Improve drainage, avoid overwatering, change soil if needed.
Conclusion
Transforming old plastic bottles into eggplant planters is an innovative, eco-friendly, and productive way to grow vegetables at home. By following these steps—preparing bottles, planting seedlings, ensuring proper sunlight, water, fertilization, support, pruning, and pollination—you can enjoy healthy, bushy eggplants with abundant fruits right from your balcony, rooftop, or windowsill.
This method not only maximizes limited space but also recycles plastic, reduces costs, and allows you to grow fresh, organic vegetables safely. With patience, regular care, and creativity, even beginners can achieve a bountiful eggplant harvest, proving that small spaces and old plastic bottles can yield big results.
Start today, repurpose those old bottles, and experience the joy of homegrown, fruitful eggplants!