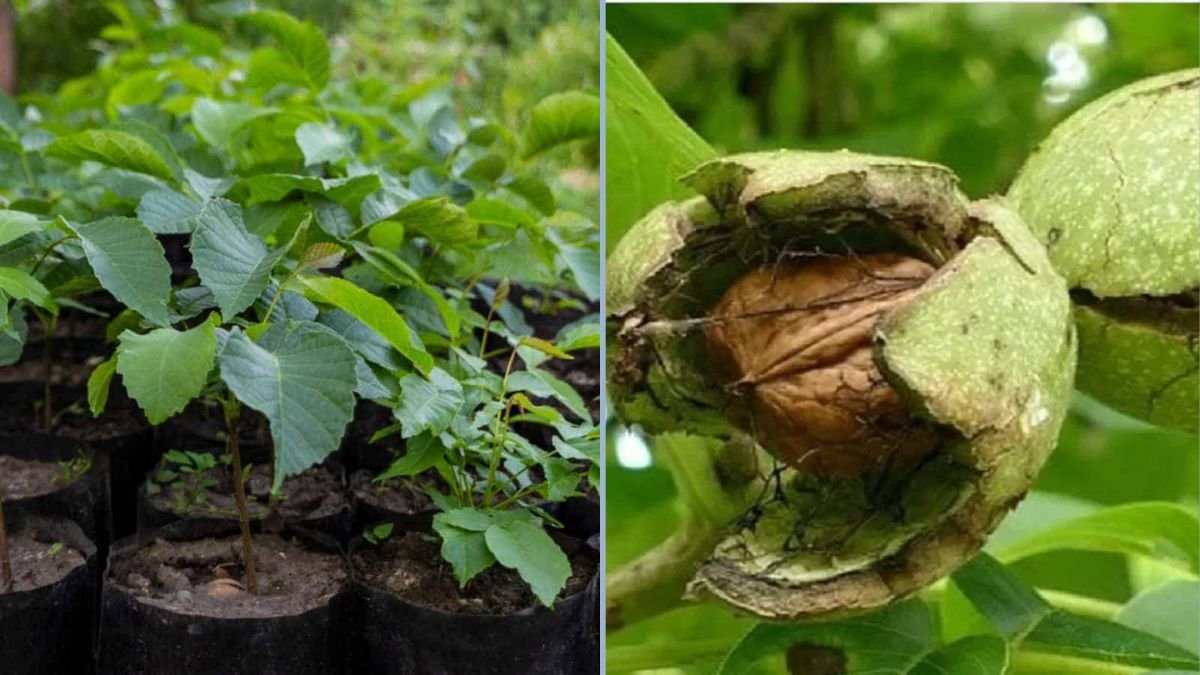
Walnut trees are renowned for their majestic appearance, dense shade, and nutrient-rich nuts. While many gardeners rely on saplings or grafted trees, growing a walnut tree from seed is a rewarding and cost-effective way to cultivate your own walnut tree at home. Propagating walnuts from seeds allows you to experience the entire growth journey—from a tiny seed to a towering, productive tree.
In this guide, we’ll cover the complete propagation process, step-by-step instructions for growing walnut seeds at home, and essential care tips to ensure healthy growth and future nut production.
Why Grow Walnut Trees from Seed?
Growing a walnut tree from seed has several advantages:
- Cost-effective: Seeds are far cheaper than nursery saplings or grafted trees.
- Genetic diversity: Trees grown from seed can develop unique characteristics and adapt to local conditions.
- Satisfaction: Watching a walnut tree grow from a seed is a highly rewarding experience for home gardeners.
- Control over care: Starting from seed allows you to manage soil, water, and organic care from the beginning.
Although it takes longer for seed-grown trees to bear fruit compared to grafted trees (typically 6–10 years), the process is simple and achievable with patience and consistent care.
Step 1: Selecting Walnut Seeds

The first step in successful propagation is choosing healthy, viable seeds:
- Mature nuts: Select fully mature walnuts that have fallen naturally from the tree or been harvested. Mature seeds are more likely to germinate.
- Intact shells: Avoid cracked, damaged, or moldy nuts, as these may not germinate.
- Freshness: Fresh seeds have the highest germination rates. If storing for a short period, keep them in a cool, dry place.
Choosing high-quality seeds is critical for a strong, healthy start.
Step 2: Preparing Walnut Seeds for Planting
Walnut seeds require stratification, a natural process that simulates winter conditions, to break dormancy and encourage germination:
Cold Stratification Process
- Soak the seeds: Place the walnuts in water for 24–48 hours to soften the hard outer shell and promote moisture absorption.
- Prepare the medium: Mix sand and peat moss in equal parts. This mixture retains moisture and provides a stable environment for the seeds.
- Layer the seeds: Place the soaked walnuts in the medium and cover them completely.
- Refrigeration: Store the seeds in a plastic bag or container in the refrigerator at 2–4°C (36–40°F) for 2–3 months.
- Check periodically: Ensure the medium remains slightly moist, not soggy, to prevent mold growth.
Cold stratification mimics natural winter conditions, signaling to the seed that it’s safe to germinate when planted.
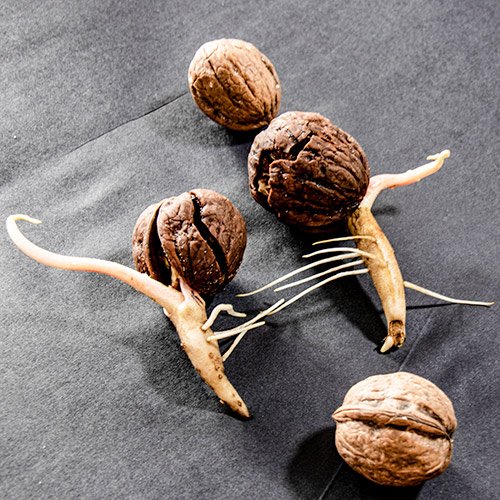
Step 3: Germinating Walnut Seeds
Once stratification is complete, it’s time to germinate the seeds:
- Choose containers: Use pots or seed trays with good drainage. Start with containers that are 6–8 inches deep to accommodate developing roots.
- Prepare soil: Use a well-draining mix of garden soil, compost, and sand in equal parts. A nutrient-rich medium promotes strong seedling growth.
- Planting depth: Place each seed 1–2 inches deep, with the pointed end facing downward. Cover lightly with soil.
- Watering: Water gently to keep the soil moist but not waterlogged. Overwatering can cause seed rot.
- Sunlight: Place the containers in a warm, bright location with indirect sunlight. Avoid direct harsh sunlight at this stage.
- Germination period: Walnut seeds typically sprout in 4–8 weeks. Be patient, as germination may vary depending on seed quality and environmental conditions.
Once seedlings emerge, gradually introduce them to more sunlight to strengthen stems and leaves.
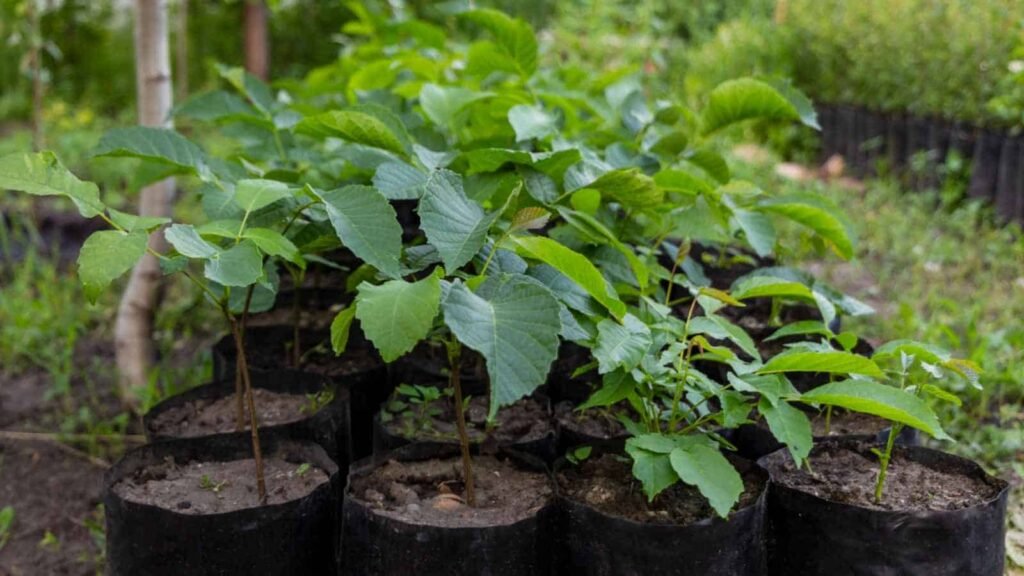
Step 4: Transplanting Seedlings
When the walnut seedlings reach 6–12 inches in height, it’s time to transplant them into larger containers or directly into the garden:
Transplanting Steps
- Select location: Choose a sunny site with well-draining soil. Walnut trees need at least 6–8 hours of sunlight daily.
- Prepare planting hole: Dig a hole twice as wide as the seedling’s root ball and just as deep.
- Amend soil: Mix garden soil with compost to provide nutrients for young trees.
- Remove seedling carefully: Gently remove the seedling from the container, keeping the soil around the roots intact.
- Planting depth: Place the seedling at the same depth it was growing in the container. Backfill the hole and water thoroughly.
- Mulching: Apply a 2–3 inch layer of organic mulch around the base to retain moisture and suppress weeds.
Proper transplanting minimizes shock and ensures strong establishment in the new location.
Step 5: Caring for Young Walnut Trees
Caring for walnut seedlings is crucial for healthy growth and future fruiting:
Watering
- Water young seedlings regularly, keeping the soil moist but not waterlogged.
- As trees mature, they become more drought-tolerant, but deep watering during dry spells encourages strong root development.
Fertilization
- Apply a balanced, slow-release organic fertilizer every 2–3 months during the growing season.
- Use compost or well-rotted manure to supply essential nutrients naturally.
Pruning
- Focus on developing a strong central stem and well-spaced branches.
- Remove dead, weak, or damaged shoots to promote healthy structure.
- Prune lightly during the first few years to encourage strong growth.
Pest and Disease Management
- Watch for aphids, caterpillars, and fungal infections.
- Organic treatments like neem oil, garlic spray, or horticultural soap can prevent pest infestations.
- Ensure proper spacing and airflow to reduce disease risk.
Step 6: Long-Term Care and Growth
Walnut trees are slow-growing but long-lived. Consistent care ensures strong, productive trees:
- Spacing: Mature trees require ample space (40–60 feet apart) to avoid competition.
- Sunlight: Full sun is essential for nut production.
- Soil care: Periodically add compost or organic mulch to maintain soil fertility.
- Irrigation: During dry periods, provide deep watering to encourage root growth.
- Protection: Protect young trees from frost, strong winds, and animal damage using fencing or shelters.
Patience is key, as walnut trees may take 6–10 years to produce significant nuts, but the investment pays off in long-term harvests.
Step 7: Harvesting Walnuts from Seed-Grown Trees
Once your walnut tree matures, harvesting becomes the exciting reward of years of care:
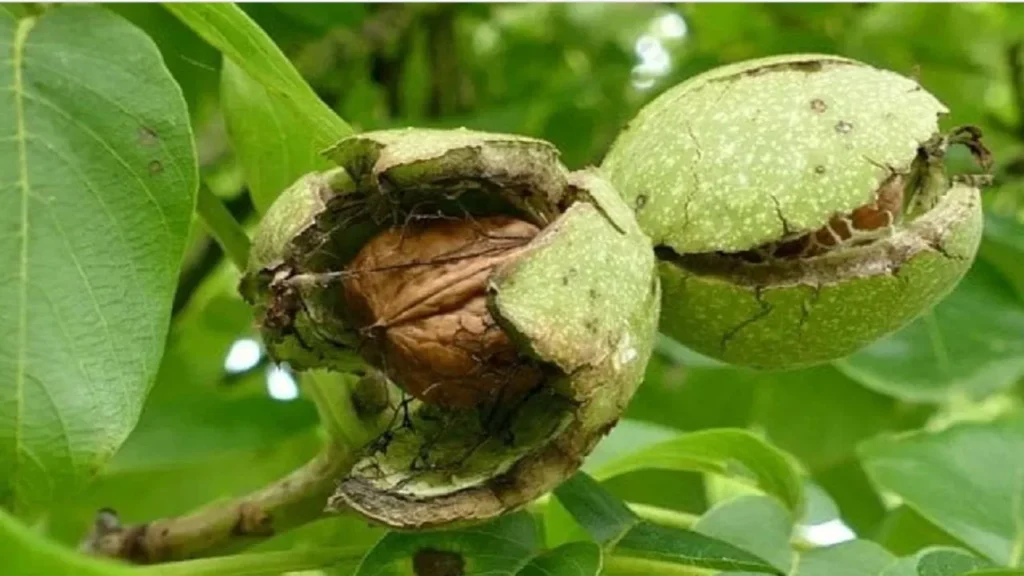
- Signs of maturity: Nuts fall naturally when ripe or the green husk begins splitting.
- Collection: Gather fallen nuts promptly to prevent decay or pest damage.
- Husk removal: Remove the outer green husk to reveal the hard shell.
- Drying: Dry nuts in a cool, ventilated area for 2–4 weeks.
- Storage: Store shelled walnuts in airtight containers in a cool, dry place.
Seed-grown walnut trees may produce smaller yields initially, but proper care gradually increases both quality and quantity.
Tips for Successful Walnut Propagation at Home
- Select healthy seeds and avoid old or damaged nuts.
- Follow cold stratification to improve germination rates.
- Use nutrient-rich, well-draining soil for seedlings.
- Water consistently but avoid overwatering to prevent rot.
- Gradually acclimate seedlings to sunlight for stronger growth.
- Prune carefully to develop a strong structure.
- Protect young trees from pests, frost, and animals.
- Be patient: Seed-grown walnut trees take several years to fruit.
Conclusion
Growing a walnut tree from seed is a rewarding and educational experience that allows gardeners to witness the full life cycle of this majestic tree. By selecting healthy seeds, stratifying them properly, germinating with care, and nurturing seedlings through consistent watering, fertilization, and pruning, anyone can successfully propagate walnuts at home.
While it requires patience—seed-grown walnut trees typically take 6–10 years to bear significant nuts—the long-term benefits are worth the effort. Not only will you enjoy nutrient-rich, homegrown walnuts, but you’ll also have a beautiful, long-living tree that enhances your garden and provides shade, beauty, and a sustainable food source for years to come.
Starting a walnut tree from seed is more than gardening—it’s a journey from a tiny seed to a magnificent, productive tree. With proper care and dedication, your walnut propagation project at home can yield both personal satisfaction and delicious harvests for decades.