Bean sprouts are a staple in many cuisines around the world — from Asian stir-fries to fresh salads, soups, and sandwiches. They are crisp, nutritious, and easy to digest, making them one of the healthiest additions to any diet. But did you know you can grow fresh, white, and plump bean sprouts at home using just a plastic bottle?
Inspired by the YouTube video “Making Bean Sprouts at Home from Plastic Bottles is Easy — Both White and Plump,” this blog will show you a step-by-step guide to growing your own sprouts at home. This method is not only easy but also cost-effective, eco-friendly, and surprisingly fast.
Whether you’re a beginner gardener or someone who loves fresh, chemical-free food, this technique will help you enjoy delicious bean sprouts all year round.
Why Grow Bean Sprouts at Home?
Bean sprouts are not only tasty but extremely nutritious, packed with vitamins, minerals, and proteins. Growing them at home ensures they are:
- Chemical-free: No pesticides or artificial fertilizers.
- Fresh and crunchy: Harvest just before use for peak flavor.
- Highly nutritious: Full of vitamin C, folate, protein, and fiber.
- Economical: A small amount of seeds produces a large amount of sprouts.
- Sustainable: Minimal water and space required.
Homegrown bean sprouts are fresher and whiter and plumper than store-bought ones, which are often grown in large-scale operations and may lose some nutrients during storage.
Understanding Bean Sprouts
Bean sprouts are the young seedlings of various legumes, most commonly:
- Mung beans (green gram) — the most popular for Asian cooking.
- Soybeans — used in salads and soups.
- Black-eyed peas or lentils — for variety and flavor.
When sprouted, the beans develop a crisp white stem and tiny green leaves, which are tender and easy to digest. The key to producing white and plump sprouts is controlling light, water, and temperature during germination.
Materials You’ll Need
This plastic bottle method is simple and uses items you probably already have at home:
- Plastic bottle (1.5–2 liters) — clean and empty
- Bean seeds — mung beans or soybeans work best
- Water — for soaking and rinsing
- Mesh or cloth — for drainage
- Scissors or knife — to cut the bottle
- Rubber band or string — to hold the mesh in place
That’s it! No soil, fertilizers, or complex equipment required.
Step 1: Prepare the Plastic Bottle
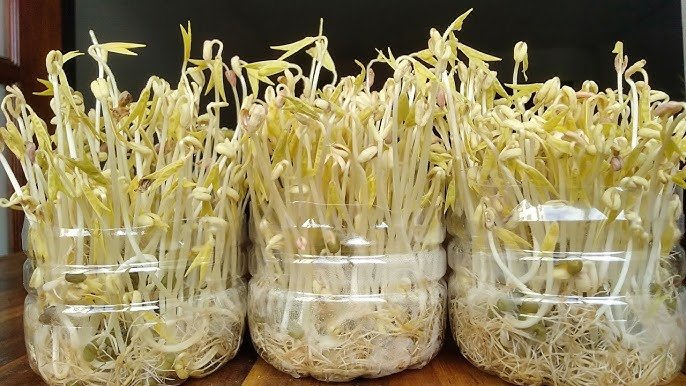
- Wash the bottle thoroughly to remove any residue.
- Cut the bottle about one-third from the top.
- The bottom section will serve as a water reservoir.
- The top section will hold the seeds and act as a sprouting container.
- Poke several small drainage holes at the bottom of the top section.
Optional: If you want a hands-free draining system, you can invert the top section so it sits inside the bottom reservoir and allow water to drain automatically.
Step 2: Prepare the Bean Seeds
- Select high-quality beans free from damage or mold.
- Rinse the beans thoroughly in clean water.
- Soak the beans in water for 8–12 hours or overnight.
- This softens the seed coat and jump-starts germination.
- Use room temperature water and ensure beans are fully submerged.
Soaking is crucial — without it, the sprouts may grow slowly or unevenly.
Step 3: Set Up the Sprouting Container
- Line the top section of the bottle with mesh, cloth, or fine strainer material to hold seeds while allowing water to drain.
- Place the soaked beans on top of the mesh in a single layer.
- Invert the top section over the bottom bottle half (which contains clean water) so that the mesh touches the water lightly.
This setup allows consistent moisture without waterlogging the seeds, which is essential for white, plump sprouts.
Step 4: Maintain Proper Moisture
The key to crisp and plump bean sprouts is consistent moisture:
- Rinse the beans 2–3 times a day with clean water.
- Allow excess water to drain completely to prevent rot.
- Keep the beans moist but not soaking.
The plastic bottle acts as a mini greenhouse, maintaining humidity while preventing stagnation.
Step 5: Controlling Light for White Sprouts
For the whitest sprouts, you need limited light during germination:
- Place the bottle in a dark or shaded area for the first 2–3 days.
- Too much light will produce green tips, which are still edible but not ideal if you want classic white sprouts.
Once the sprouts are about 3–4 cm long, you can expose them to indirect light to develop tiny green leaves while keeping the stems white and tender.
Step 6: Temperature and Airflow
- Keep the sprouting bottle at room temperature (20–25°C / 68–77°F).
- Ensure good ventilation to prevent mold or fungus.
- Avoid placing near direct heat or sunlight, which can dry out the sprouts.
Consistent temperature and airflow are essential for fast germination and uniform sprout growth.
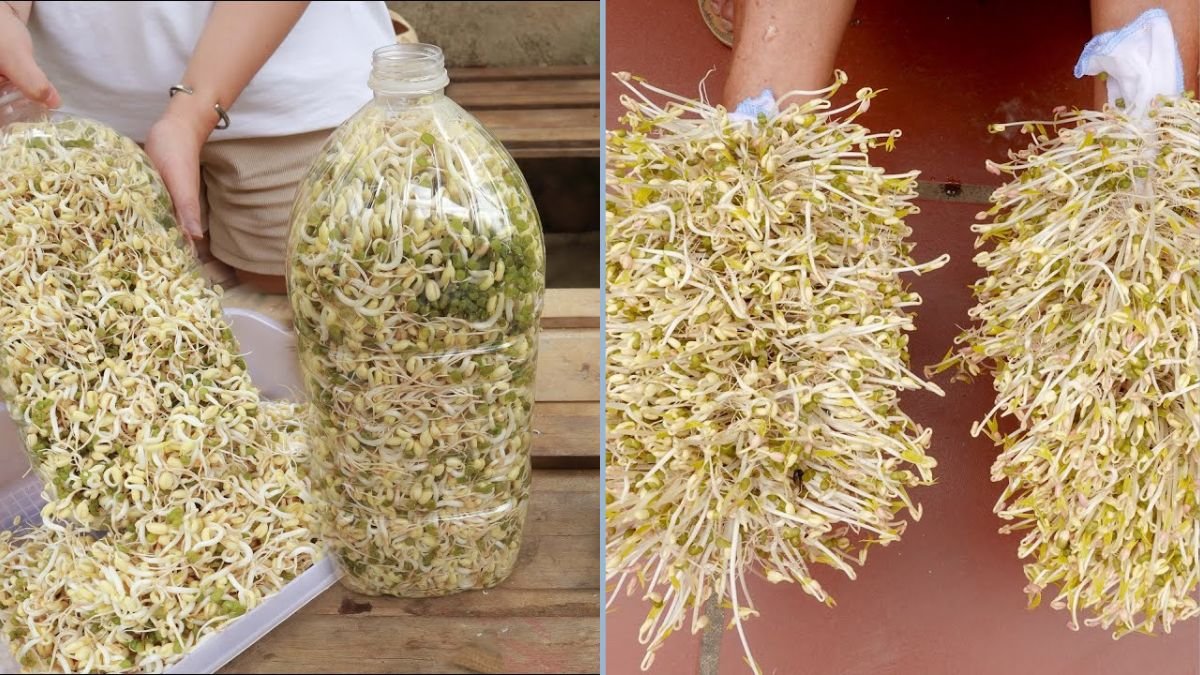
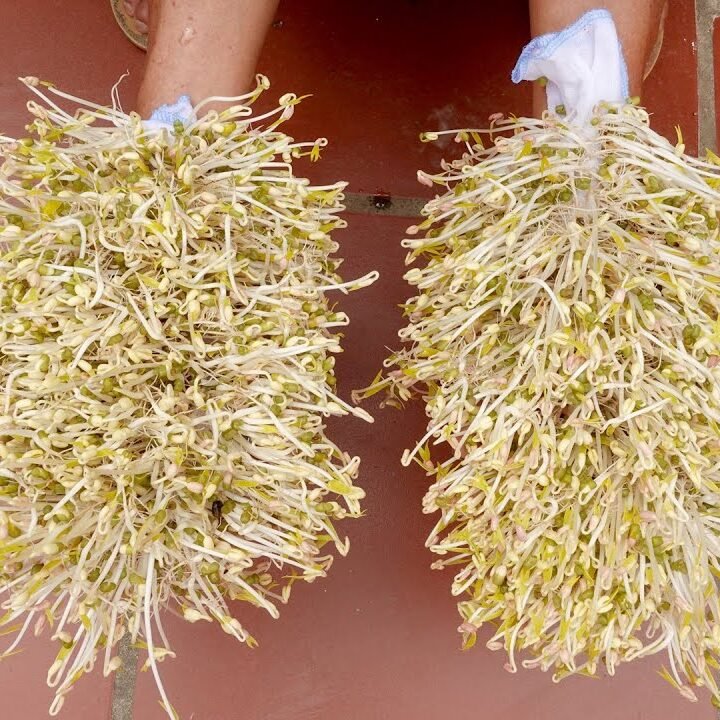
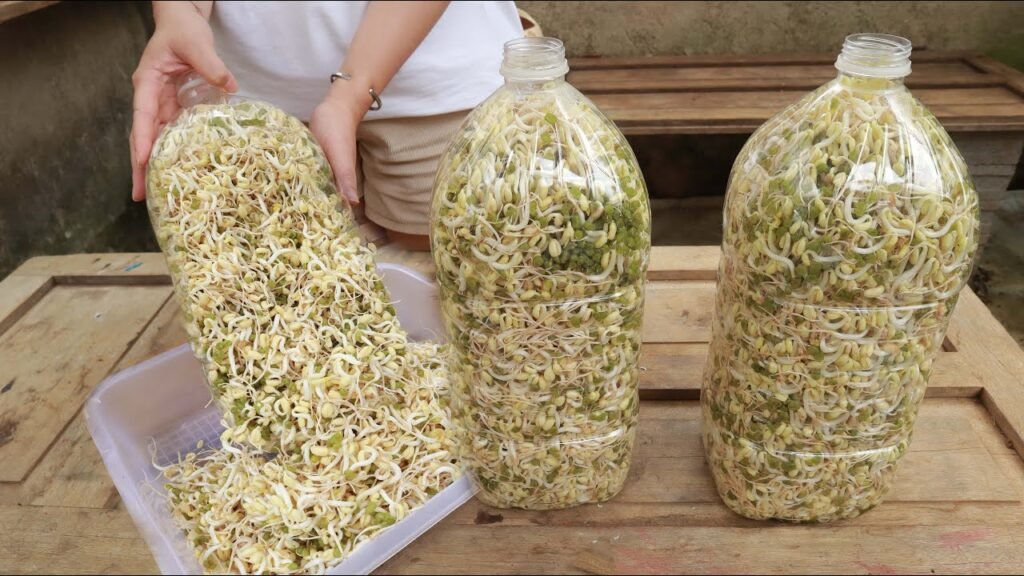
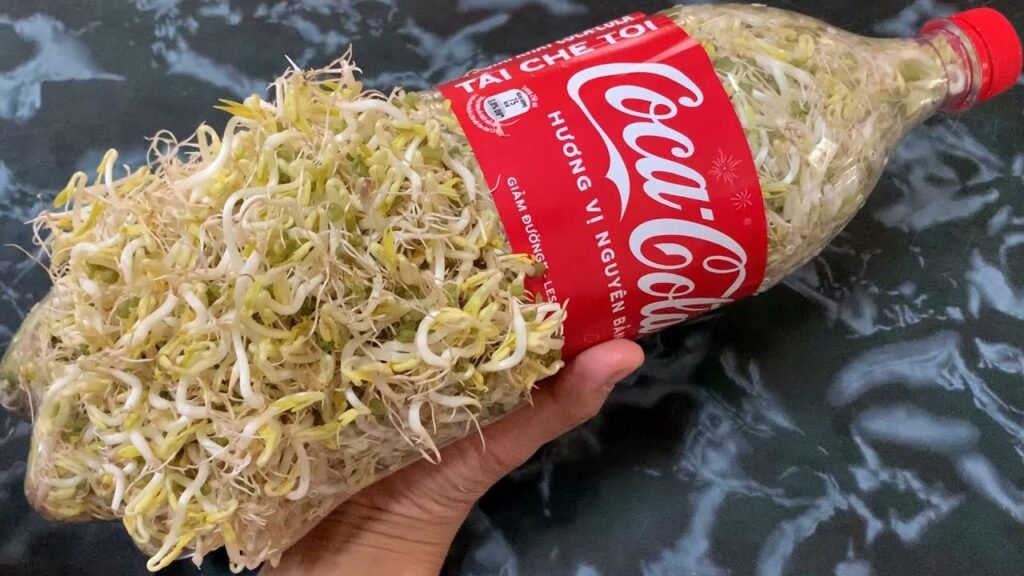
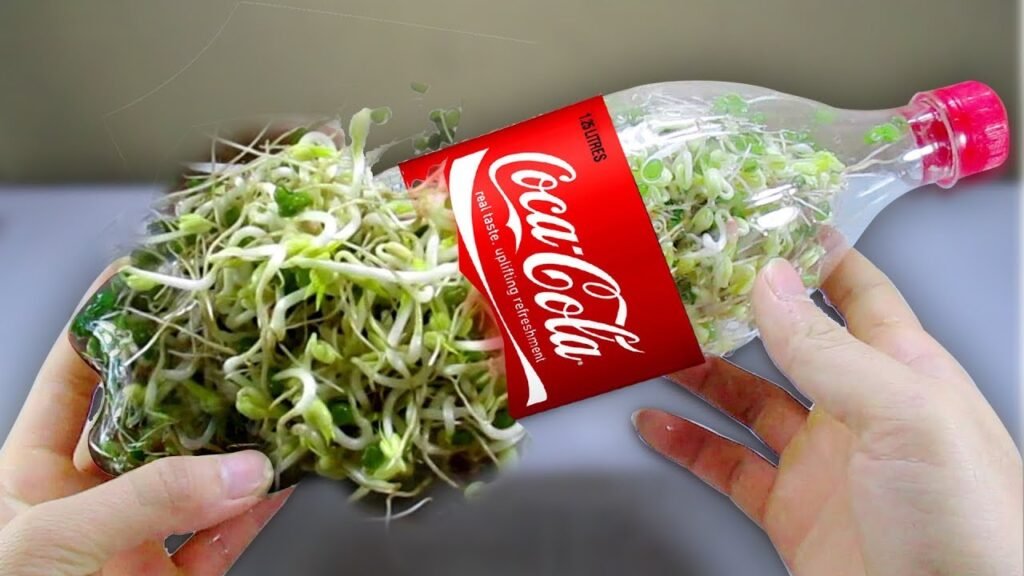
Step 7: Harvesting Your Bean Sprouts
Bean sprouts are ready to harvest in 4–6 days, depending on seed type and conditions:
- Look for white, crisp stems about 5–7 cm long.
- Cut the sprouts just above the mesh or drain them carefully into a bowl.
- Rinse thoroughly in cool water and drain before storing or cooking.
Pro tip: Harvest all at once for maximum freshness, or trim small portions daily for continuous use.
Tips for Plump, White Sprouts
- Use fresh seeds — older seeds may sprout slowly or unevenly.
- Keep them in darkness initially to maintain white color.
- Rinse 2–3 times daily to remove any bacteria and keep sprouts hydrated.
- Avoid overcrowding — a thin layer of seeds ensures proper air circulation.
- Use cool water for rinsing to prevent heating, which can affect plumpness.
Following these steps ensures your sprouts are both white and plump, perfect for eating raw or lightly cooked.
Common Problems and How to Solve Them
| Problem | Cause | Solution |
|---|---|---|
| Moldy sprouts | Excess moisture or poor ventilation | Reduce watering, increase airflow |
| Green tips | Too much light | Keep sprouts in darkness during early days |
| Uneven growth | Overcrowding or old seeds | Spread seeds thinly, use fresh seeds |
| Rotten seeds | Waterlogging | Ensure proper drainage, avoid stagnant water |
Most issues are easy to fix by adjusting light, water, or spacing.
Storing Bean Sprouts
- Store fresh sprouts in a covered container in the refrigerator.
- Keep slightly damp but not wet to maintain crunchiness.
- Use within 2–3 days for best flavor and texture.
Bean sprouts are best eaten fresh, either raw in salads, lightly sautéed, or added to soups.
Culinary Uses for Bean Sprouts
- Stir-fries: Quickly sauté with garlic, soy sauce, or sesame oil.
- Salads: Mix with fresh greens, cucumbers, and a light dressing.
- Soups: Add near the end of cooking for a crisp texture.
- Sandwiches and wraps: Provide a fresh, crunchy layer.
- Juices and smoothies: Blend lightly for extra nutrients.
Bean sprouts are versatile and add a fresh, crisp, slightly nutty flavor to any dish.
Benefits of Growing Bean Sprouts at Home
- Cost-effective: A small amount of seeds produces a large yield.
- Quick and easy: Ready in under a week.
- Fresh and chemical-free: Perfect for health-conscious households.
- Space-saving: Can grow on a kitchen counter or small shelf.
- Sustainable: Uses recycled bottles and minimal water.
By growing your own sprouts, you control every aspect of their growth, ensuring maximum nutrition and freshness.
Final Thoughts
Making bean sprouts at home using plastic bottles is a simple, effective, and rewarding way to grow fresh, white, and plump sprouts all year round. With minimal equipment and effort, you can enjoy organic, crunchy, and nutrient-rich sprouts straight from your kitchen.
This method is perfect for:
- Beginners looking for a low-maintenance project
- Busy people who want fresh greens without gardening space
- Families wanting a sustainable, eco-friendly food source
With consistent care — proper soaking, controlled moisture, darkness, and airflow — you’ll have a constant supply of delicious bean sprouts in less than a week.
So don’t throw away that plastic bottle — turn it into a mini sprout garden and enjoy fresh, healthy, and plump bean sprouts at home!