
Watermelon is one of the most refreshing and beloved fruits, perfect for hot summer days. Its sweet, juicy flesh and high water content make it a favorite for families and gardeners alike. But many people assume that growing watermelon at home is difficult, requiring large fields, lots of space, and meticulous care.
Here’s the good news: with the right method, even a home gardener can grow healthy, high-yielding watermelons. In fact, one innovative method has proven so effective that the yield can be astonishing. This guide will take you through a step-by-step approach to growing watermelons at home using a unique technique that surprised even experienced gardeners.
Why Grow Watermelon at Home?

- Freshness: Nothing beats biting into a homegrown, fully ripened watermelon.
- Cost Savings: Save money by avoiding expensive store-bought watermelons.
- Control Over Growth: You decide what fertilizers and pesticides to use.
- Fun & Rewarding: Growing watermelon is a satisfying hobby, especially when the fruit yield exceeds expectations.
- Space Optimization: Using innovative techniques, watermelons can be grown even in limited spaces.
Step 1: Choosing the Right Watermelon Variety
Not all watermelons are suitable for home gardening. Consider:
- Size: Small to medium varieties (Sugar Baby, Crimson Sweet) are ideal for container or backyard growth.
- Climate: Watermelons need warm temperatures (21–35°C) and plenty of sunlight.
- Days to Harvest: Choose varieties with shorter maturity periods if you want quicker results.
Pro Tip: Compact varieties are easier to manage and yield surprisingly well when grown in controlled conditions.
Step 2: Preparing the Growing Area
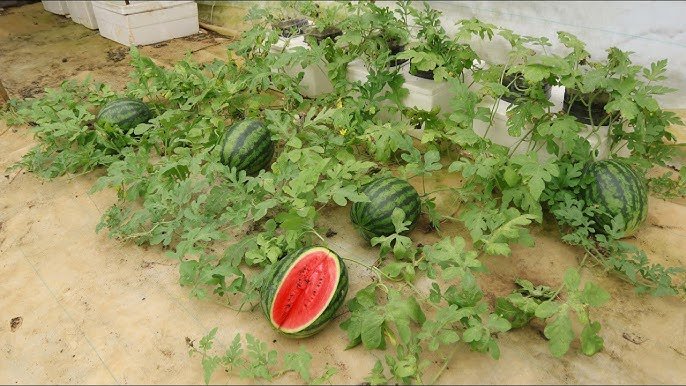
Watermelons traditionally need lots of space to sprawl. However, the unique method involves smart space utilization:
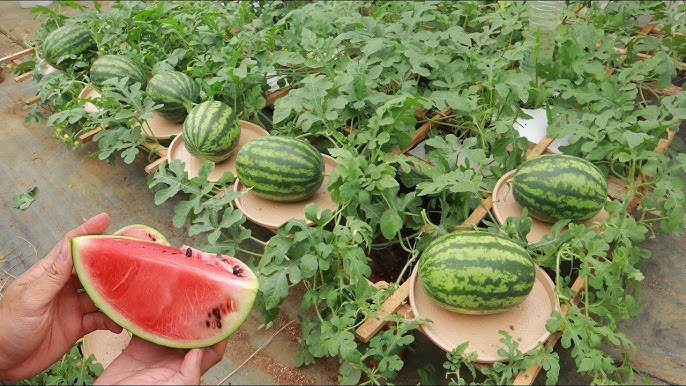
- Containers or Raised Beds: Use large pots, grow bags, or raised beds filled with nutrient-rich soil.
- Soil Requirements: Watermelons prefer loamy, well-drained soil with a pH between 6.0–7.5.
- Support for Vines: You can train vines vertically using trellises or strong supports, saving space and improving air circulation.
Pro Tip: Ensure the soil is rich in organic matter for maximum yield. Compost, well-rotted manure, or vermicompost works best.
Step 3: Planting Watermelon Seeds or Seedlings
- Seed Germination:
- Soak seeds in water for 24 hours before planting to improve germination.
- Plant seeds 1–2 inches deep in moist soil.
- Seedling Transplant:
- Once seedlings develop 2–3 true leaves, transplant them into the main growing area.
- Ensure spacing is adequate: 50–75 cm between plants if using traditional horizontal growth, or slightly closer for vertical setups.
Pro Tip: Handle seedlings gently to avoid damaging roots during transplanting.
Step 4: The Unique Growing Method
This method focuses on vertical growth and controlled feeding, which significantly boosts yield:
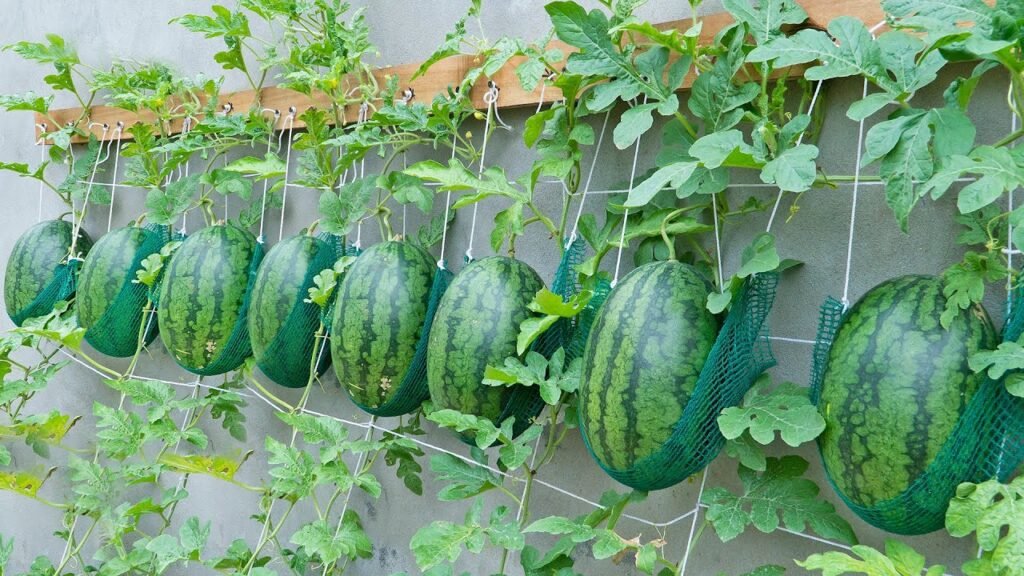
- Vertical Trellising:
- Use strong trellises or netting to train watermelon vines upward.
- Secure vines loosely with soft ties to prevent damage.
- This reduces ground contact, minimizing rot and pest attacks.
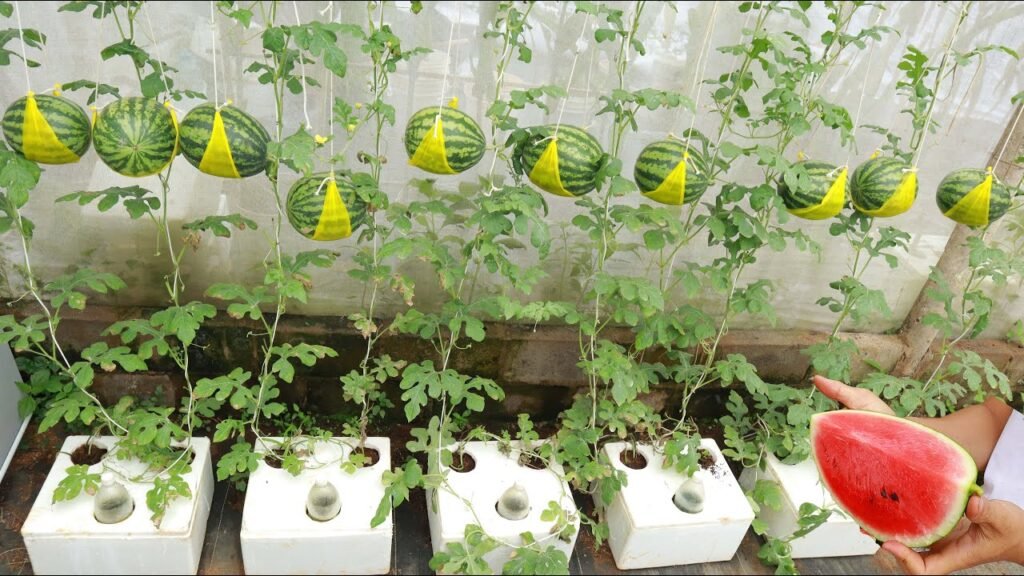
- Fruit Support:
- As fruits develop, place slings or nets under them to support weight.
- This prevents the fruit from falling off or getting damaged while growing.
- Nutrient Management:
- Watermelons are heavy feeders. Apply organic fertilizers rich in nitrogen during vegetative growth.
- Switch to phosphorus and potassium-rich fertilizers during flowering and fruit development.
- Water Management:
- Watermelons need consistent moisture, especially during flowering and fruiting.
- Avoid waterlogging; use drip irrigation or controlled watering for optimal root health.
Pro Tip: Vertical growth increases sunlight exposure and airflow, promoting faster flowering and healthier fruits.
Step 5: Ensuring Maximum Flowering and Fruit Set
- Pollination:
- Watermelon flowers are usually pollinated by bees. For home setups, hand pollination can be effective.
- Use a soft brush or cotton swab to transfer pollen from male to female flowers.
- Pruning for Better Yield:
- Remove weak or excess vines to direct energy toward fewer but larger and sweeter fruits.
- Trim leaves that block sunlight to improve photosynthesis.
- Mulching:
- Use straw, dry leaves, or black plastic sheets around the base to retain soil moisture and regulate temperature.
- Mulching also prevents weed growth and keeps fruits clean.
Step 6: Pest and Disease Management
Watermelons can face pests like aphids, fruit flies, and red spider mites, and diseases such as powdery mildew or fusarium wilt.
- Preventive Measures:
- Maintain cleanliness and remove dead leaves.
- Ensure proper spacing and airflow.
- Organic Solutions:
- Neem oil, garlic spray, or soapy water can control minor pests.
- Regular Inspection:
- Check plants daily for early signs of damage or disease.
Pro Tip: Vertical growth reduces soil contact, which naturally lowers the risk of soil-borne diseases.
Step 7: Harvesting Your Watermelon
Harvesting at the right time ensures maximum sweetness and juiciness:
- Signs of Ripeness:
- The tendril nearest to the fruit turns brown and dries.
- The underside of the fruit touching the soil or support turns creamy yellow.
- The rind develops a dull sheen rather than glossy.
- Harvesting Technique:
- Cut the fruit using a sharp knife, leaving 2–3 inches of stem attached.
- Avoid twisting or pulling to prevent damage to the vine.
Pro Tip: Harvesting at the right time ensures the fruit is sweet, flavorful, and has a high water content.
Step 8: Maximizing Yield from Limited Space
This unique method allows high yield even in small areas:
- Vertical Trellising: Frees ground space for additional plants.
- Multiple Plants in Containers: Small varieties can be planted in large grow bags.
- Companion Planting: Planting herbs like basil or marigold near watermelon can reduce pests and enhance growth.
- Regular Pruning: Focus energy on selected fruits to improve size and quality.
Pro Tip: A single vertical watermelon plant can produce 2–4 large fruits in a home setup, sometimes even more depending on care and variety.
Step 9: Benefits of Growing Watermelon at Home
- Freshness and Taste: Homegrown watermelons are sweeter and juicier than store-bought.
- Control Over Inputs: Avoid harmful chemicals and grow organically.
- Decorative Value: Vertical vines and hanging fruits create a beautiful green display.
- Space Efficiency: Innovative growing methods allow maximum yield in limited spaces.
- Health Benefits: Rich in water, vitamins, and antioxidants, perfect for summer hydration.
Step 10: Lessons Learned from This Unique Method
- Creativity Matters: You don’t need a large farm to grow watermelons—innovative approaches can yield surprising results.
- Monitoring is Key: Regular care, water changes, pruning, and pest management are crucial.
- Patience Pays Off: Watermelons require 70–90 days from planting to harvest; consistent care ensures the best results.
- Small Tweaks, Big Impact: Adding slings, using vertical trellises, and optimizing nutrient supply can dramatically increase yield.
Conclusion
Growing watermelons at home is not only possible but incredibly rewarding. By following this unique method—vertical growth, proper nutrition, careful pruning, and fruit support—you can enjoy a surprisingly high yield even in limited space.
Whether you are a beginner or an experienced gardener, this method combines efficiency, creativity, and practicality, ensuring sweet, juicy, and healthy watermelons straight from your home garden.
Start small, monitor your plants, and you’ll soon be amazed at the results, proving that even space-limited home gardeners can enjoy a bountiful watermelon harvest.